Want to further improve the performance of your Google Ads? Then you need to start using scripts. In this article, we at Grow Easy Digital Agency will help anyone who wants to use Google Ads scripts in their ad profiles.
You probably feel like your manager looking at your Excel spreadsheets. Where do you even start?

Fear no more.
Here's a quick demo on how to install and run a Google Ads script in under 5 minutes!
Follow the steps below to configure the script in the new interface. The good news: you don't need to know javascript to start scripting for Google Ads.
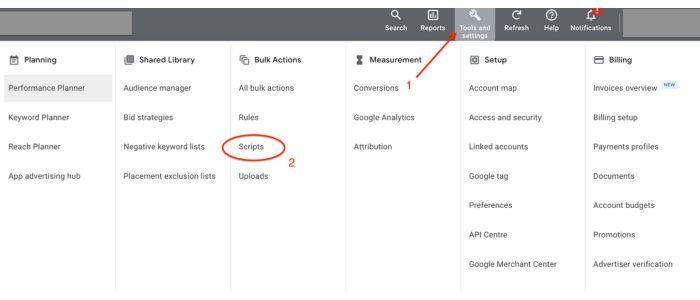
Step 1 and 2: Figure out where to place Google Ads scripts
Easy. You'll find a wrench icon in the top right corner that will take you to Tools, Billing, and Settings. Click on it.
Then under the " Bulk Actions" tab, click on "Scripts".
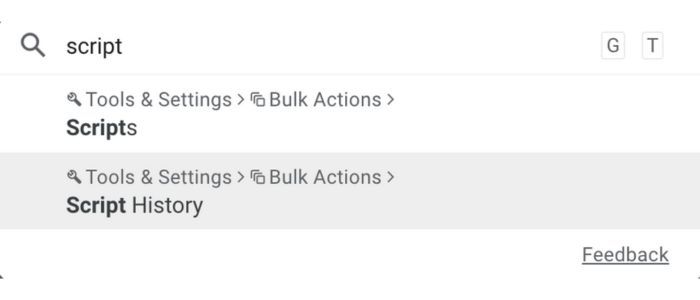
PRO TIP: In the new interface, you can use keyboard shortcuts. If you type "gt" anywhere in the interface, a search box will appear, allowing you to quickly navigate the interface. Search for "scripts" and press Enter.
Step 3: Add new scripts for Google Ads
Once you navigate to the "Scripts" tab in Google Ads, you'll see a list of currently installed scripts. The list will be empty if you have no scripts installed. Very clear.
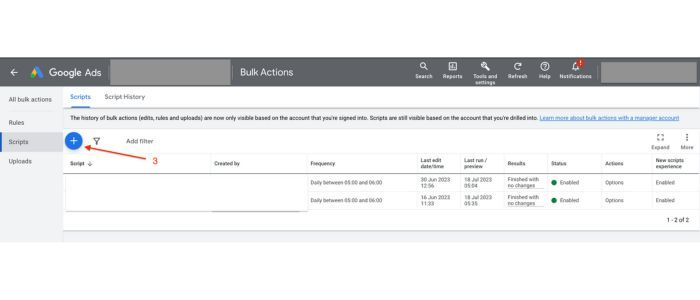
Now click the big blue dot with a plus sign to add a new script. This will open the Google Ads script editor.
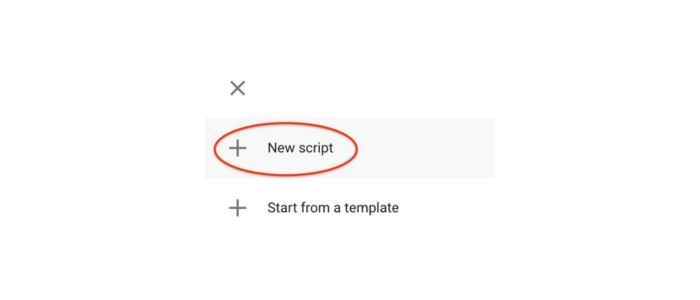
Step 4: Copy and paste or type the code
You're now in the Ads Scripts editor or, as some fancy developers would call it, the Google Ads Scripts IDE. IDE is an acronym for "Interactive Development Environment," but you can forget about that for now. The important thing is that this is where the magic happens! This is where you add and edit your javascript code.
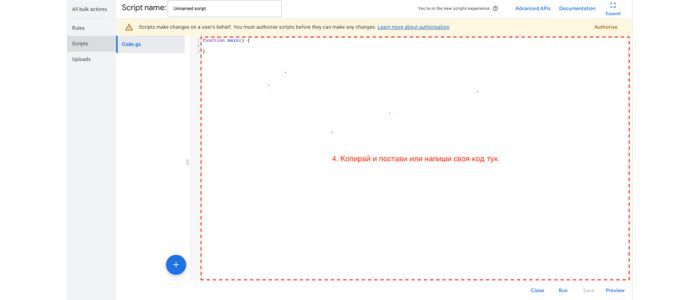
For now, just copy and paste the sample code below or copy your own code. Google automatically adds a small piece of code when you create a new script:
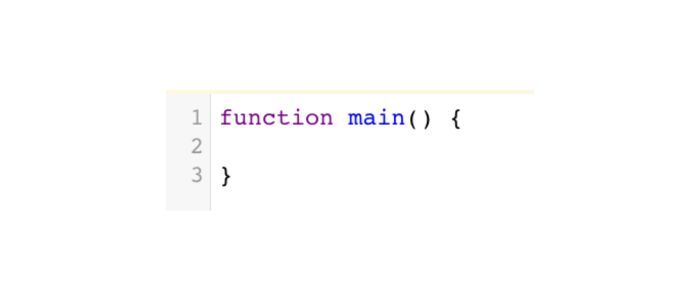
Be sure to replace that piece of code entirely with the code you copy.
NOTE: If you copy and paste some of the other Google Ads scripts that exist, you may need to change some configuration settings in the script. Follow the instructions for the script and everything will be fine. The instructions can often be found in the script's comments (comments are colored orange in the Ads Script editor) or in the documentation on the webpage where the script is posted.
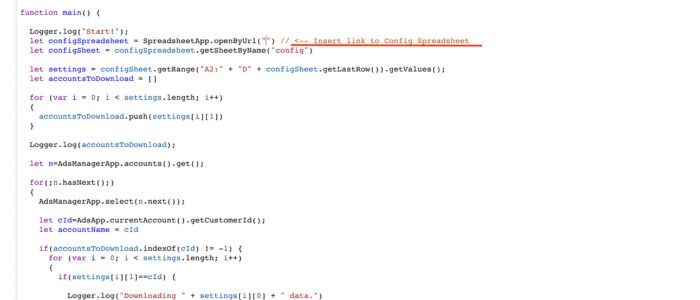
Step 5, 6: Name, save and resolve
Now give your script a name (above the script, at the top of the screen). You may see an asterisk (*) in front of the script name, indicating that you have some unsaved changes. Save the script and click Authorise to give the script permission to run.
Scripts are independent entities in Google Ads that take actions on behalf of the user. For this reason, Google requires that you explicitly give scripts permission to run.
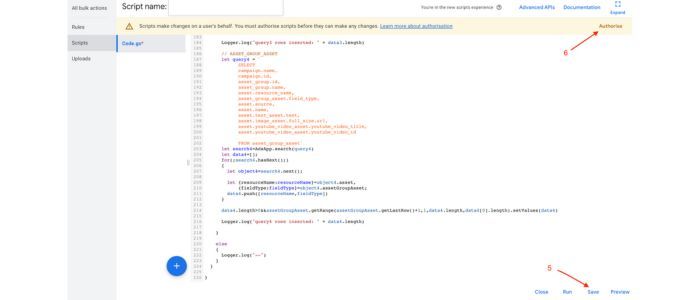
Step 7,8: View and run scripts for Google Ads
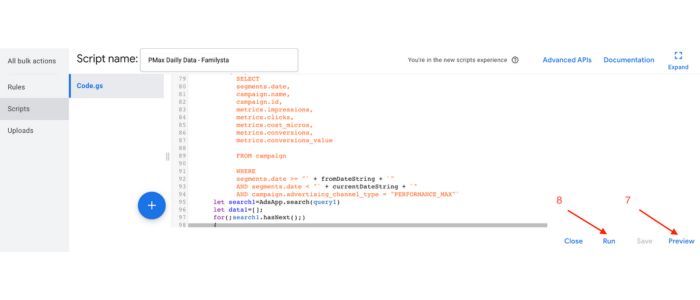
Now that your script is saved and has all the permissions to make changes on your behalf, you want to make sure it only makes the changes you want it to make. This is where the Preview option comes in. The preview allows you to see what will happen if you decide to actually run the script. In Preview mode, no real changes are made to your account, so there's no need to fear. Keep in mind, however, that if the script makes changes to anything outside of Google Ads (like adding data to a spreadsheet), Preview mode will do the same.
Go ahead, click Preview and see what the script does.
Step 9, 10: Check the changes and logs to see what happens
This is where you can see what changes the script would have made (if you played it) or did (if you actually ran it).
Since our script doesn't make any changes to the Ads structures, it just logs information, let's take a look at the Logs tab in the editor. This is where the script records information such as error messages and its results.
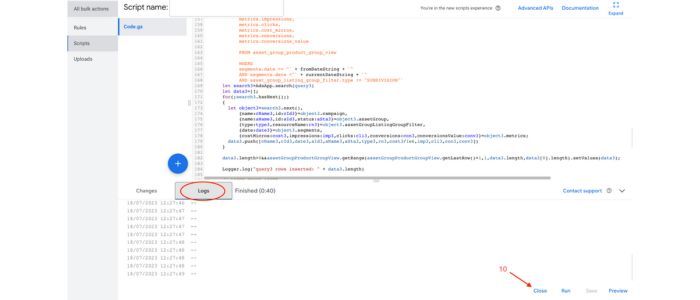
Now close the logs and return to the script overview page.
Step 11: Scheduling the script
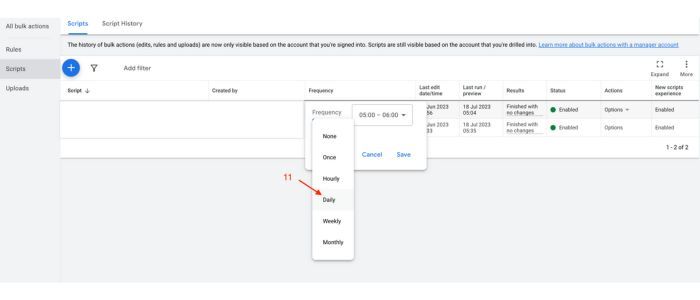
Most scripts are designed to be run repeatedly. For example, daily, once a week, or once a month. This is where you schedule its frequency.
Also pay attention to the options in the bottom right corner. Here you can run, edit, duplicate or disable a script.
Additional information for professionals
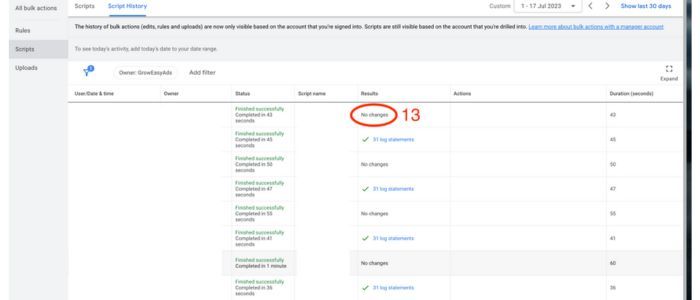
At the top of the screen you will also see "Script History". Clicking on this link will allow you to see the date and time the script was run, its status and the result.
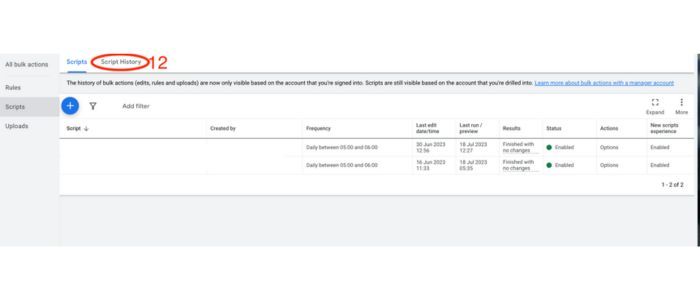
If you click on the link in the "Results" column, you will be taken to a page detailing all the changes made by the script.
Congratulations! Installed and launched your first Google Ads script! See? You can run scripts on your own. It's not so scary anymore.
Now go ahead, copy, paste and run other scripts useful for you! Another win!
